Thursday, January 24, 2013

DIY: Daily Cleansing Grains

For almost two years now, I have been making some variation of a cleansing grain recipe. Inspired by Rosemary Gladstar's Miracle Grains, I researched, ground and blended all kinds of ingredients to create my perfect cleansing grains.

What was I looking for? Texture, consistency, ease of use, application, and cleaning power. This recipe has it all and requires only four inexpensive ingredients that are available at most stores.

The cleansing grain recipe beings with oat flour as the base. Oat flour has a finer texture than rolled oats but all the same benefits. It soothes and heals the skin, reduces inflammation, and provides gentle exfoliation to remove dead skin cells. It is also very absorbent, a must in an all-natural face cleanser.

Then I incorporated ground adzuki beans (a.k.a. azuki beans). Adzuki beans are a food staple in Japan and have also been used in skin care for centuries. The ground beans are the coarse exfoliant in this recipe. I like them because the texture of the powder is softer and gentler than more mainstream ground walnut shells or apricot kernels. The adzuki beans also turn the mixture milky, which I really like in this recipe.

The third ingredient is bentonite clay. Bentonite is the cleaning powerhouse in this recipe. The benefits of bentonite clay are well documented. Bentonite heals wounds, absorbs oils, removes impurities, improves circulation, combats acne, exfoliates, and more. Bentonite is also compatible with most skin types, including sensitive skin. 

Finally rice flour provides microdermabrasion texture without being overpowering or irritating. Rice flour has a reputation for brightening skin and was used by Geishas in Japan to keep their faces smooth and lighter in color. I like it for its texture, but I'm happy to know it has been used as a DIY ingredient in skin care for generations. 
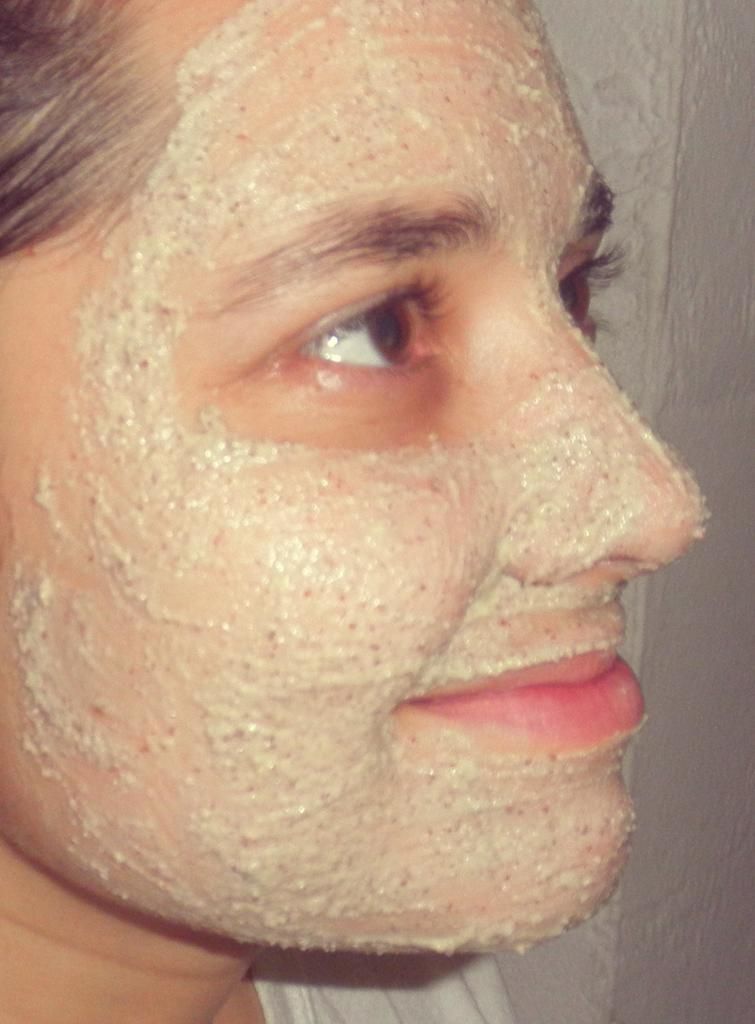

Daily Cleansing Grains in action.

DIY: Daily Cleansing Grains:

5 parts oat flour
3 parts adzuki bean flour
2 parts bentonite clay
1 part rice flour

First, grind the adzuki beans in coffee grinder until they are a fine powder. Using a fine mesh strainer, sift the ground adzuki beans and discard coarser pieces (see Adzuki Body Scrub recipe for using coarse adzuki). Depending on your preference, you can leave the adzuki powder a little coarse or you grind and sift the powder a second time to get a fine, even texture. I do it twice.
 

Then combine all ingredients in a bowl and mix well. To get a uniform consistency, I grind and sift the cleansing grain mixture one more time, but this is not necessary. Store the cleansing grains in a clean glass jar or spice shaker with a sifter top.  

I make about 6 oz by replacing "parts" with "tablespoons" in the recipe, but I recommend trying out a small batch first. You can adjust the ratios or add new ingredients as you experiment with new batches.

To use, mix 1 to 2 teaspoons of the grains with warm water in a small bowl. I use a small glass votive candle container. Stir the mixture into a paste and gently massage onto your face. For a mini facial, leave the grains on your skin for 1-2 minutes. Then rinse off with warm water. It sounds simple, but I find that people can be intimidated by the prospect of "mixing" their cleanser to the right consistency. I never get it exactly right. And sometimes, that's my favorite part.

For example, making a drier mixture makes the cleansing grains more like a mask. I work it gently into my skin in layers and by the end I have this thick, even mask. I let it dry for 5-10 minutes before rinsing it off.

When I want a more milky cleanser, I add more water than usual and let the mixture sit for 2-3 minutes. The adzuki bean releases milky goodness and the texture becomes almost fluffy. With this wetter mixture, it works more like an exfoliant than a cleanser.

I also have to address the idea that exfoliation should be done only one or twice per week. Having worked for two major department store beauty brands, this was drilled into my head during trainings. Then I learned that skin regenerates by shedding dead skin cells and pushing new ones to the surface. I though, "I want new skin cells!"

After using the cleansing grains daily for almost two years, I'm happy to report that I can exfoliate every day and my skin is clearer and fresher than ever. It has also been less sensitive. I'm not sure if that's from switching to mostly all-natural products or from the daily gentle exfoliation, but this recipe covers both scenarios.

Experimenting helped me create my perfect cleansing grain recipe. I hope you share your recipes or variations of this recipe in the comments below!


Thursday, January 03, 2013

DIY: Adzuki Body Scrub


Arrowhead Mills Adzuki Beans @Amazon
Coarsely-ground adzuki beans are a by-product of my cleansing grains recipe. Instead of composting them (vermiculture all the way), I decided to whip up a quick body scrub using the ground adzuki beans, which originated in China and Japan. 

I combined ground adzuki with olive oil just until the beans were soaked. Some oil-based body scrubs have a thick layer of oil above the exfoliant, but I prefer a drier scrub. I added enough olive oil  to leave a smooth, glassy surface on the scrub. Then I used it on my wet skin, scrubbing in a circular motion to gently remove dead skin cells. The scrub left me soft and smooth and felt great on my dry winter skin. Although a little messy, I was pleasantly surprised that the adzuki beans had an even consistency and adhered well to the oil. The mixture stayed on my skin while I scrubbed and spread easily and evenly... very important for a body scrub. I didn't mind the slightly earthy scent of the adzuki beans, but try adding just a couple drops of your favorite essential oil if you want a scented scrub.

I always forget to measure things out (and take pictures too), but here is my guesstimate for one, whole-body application:


4 tablespoons coarsely-ground adzuki beans 

4 tablespoons extra-virgin olive oil

Combine in a bowl and mix well.

As for how to use, I took a warm shower to soften my skin and open up my pores for exfoliation. I find that the scrub cleansed my skin quite well, but if you want to use soap, do it before scrubbing. You want to make sure you don’t soap off the olive oil because it nourishes and hydrates your skin after rinsing. And all oil-based mixtures have a tendency to leave some oil residue on your bath or shower floor, so be careful.


I bought my adzuki beans in bulk at my favorite local market (shout out to Ward's), but you can buy organic adzuki beans on Amazon. Enjoy!


Wednesday, January 02, 2013

Reader Stars: Top DIY Recipes & Beauty Posts from Nov & Dec

Last year went by in a whirl. It was a great year, although tough at time with lots of work and traveling. I’m optimistic that 2013 will be an even better year. My goal is to manage work with chores, relaxation and blogging. I also want to make journaling and exercise more ingrained habits. To start the year off right, here is a recap of my favorite blog posts from November and December 2012. I look forward to sharing more of my own recipes and experimenting with different ingredients. Best wishes in this new year!


12 Uses for Gelatin
Wellness Mama
Who knew that gelatin could be used in diy recipes to strengthen hair?

My Curly Hair: How (and Why) I’ve Learned to Embrace (and Even Love) It
Eco-Chick
As a curly-haired chick myself, I’ve learned to love my curls au naturel.

True Beauty Box For the Stylish & Toxic-Free at Heart
Organic Beauty Talk
Loving the idea of a green beauty box with full-sized products!

10 Ways to Go Green in 2013
My Merry Messy Life
We have already adopted many of these tips, but this year we’re going to try toilet cloths. Wish me luck. Ps. check out the Make Your Green and Natural Beauty Products post.

My Top DIYs of 2012
Michelle Phan
Includes: DIY Ice Cucumber Pads, The Potato Eye Trick, DIY Skincare: Lemongrass Facial, Steam, DIY Sun Soothers, The Cinnamon Lip Plumping Trick

DIY Beauty: round up of my favorites recipes
Viva Woman
Because we’re making DIY a theme in this Reader Stars post... I particularly liked the Sun Protection Oil recipe!

DIY Flaky Skin Remedy
BeautyLish
And the secret ingredient is... drumroll... milk. This remedy is quick and easy. Milk also works great as a face mask mixed with bentonite clay.

Want to Get Soft Hands? Make Your Own Homemade Hand Scrub!
The Nourished Life
Because I LOVE all the ingredients in this recipe!

Are Probiotics Good for Your Health?
Dr. Cynthia Bailey Skin Care
I swear by probiotics for a healthy digestive system, but I was surprised to find out they have skin benefits too.

The Top Fifteen Natural Beauty Workshop Recipes
The Natural Beauty Workshop
Lots of fun bath and body recipes, like Blissful Body Mousse and Rainbow Sprinkle Bath Tub Cookies.


Wednesday, August 29, 2012

DIY: Light Moisturizing Face Oil

Try putting on any kind of moisturizer in this humid weather (can anyone say Debby and Isaac?), and my face immediately starts sweating. Gross!

I needed something light and nourishing that would allow my skin to breathe. Here's my quickie recipe:

Light Moisturizing Face Oil


2 parts Grapeseed Oil
1 part Apricot Kernel Oil
1 part Macadamia Oil
1 part Sweet Almond Oil

Vitamin E Oil (5 drops per oz of blended oils)

Blend all of the oils together. Pour only a couple drops of the oil blend onto your palm and warm the oil between your hands. Then lightly press oil onto neck and skin. I like my skin to be damp, but it's more a personal preference.

I only blend small batches, so I made about an ounce of oil blend and mixed in 5 drops of vitamin e oil. Vitamin e helps prevent the oils from going rancid and has tons of healing properties for the skin.

My boyfriend and I are really enjoying this oil blend. As winter approaches, I'll start adding in heavier, more nourishing oils. 


Reader Stars: Top DIY Recipes & Beauty Posts from July & August

Here are the blog posts that I Starred in July & August:


Revitalise Your Health
Love her choices of DIY recipes!

Each recipe is for a different type of application: spray, powder and stick.
Follow @vivawoman


7 Ingredients- 20+ DIY Beauty Recipes  
Wellness Mama
Always stocked up on these 7 ingredients, so I'm loving the recipe options.
Follow @TheWellnessMama


@BEskincareful, loved all the pictures!
BEskincareful
Just because I would love to own a place like this one day...


Tada! Crunchy Betty’s Natural Market on Etsy
Crunchy Betty
Bought the You Macca Me Glow cleansing grains and am loving the results in this horribly humid, hot weather we're having in Florida.


All-Natural Bug Spray Recipe  
Garden Therapy
I hate bug bites. End of story. 
Follow @Garden_Therapy


Using Cosmetic Clays  
The Natural Beauty Workshop
Stocked up on white clay, red clay, green clay and bentonite this past weekned, so I can't wait to play!
Follow @FNWL


Saturday, August 11, 2012

My Favorite Beauty Ingredients: Oat + Purifying Oatmeal Mask Recipe

I recently purchased Crunchy Betty's limited edition You Maca Me Glow Cleansing Grains for Normal to Dull Skin for two reasons:
  1. I wanted to see the end product of a popular DIY-er. Crunchy Betty has really great recipes on her site, and they are as natural as it gets for skin care. I often use other people's recipes as inspiration, but I can't help but change them when I try them myself (often because of ingredient availability or known sensitivities to some of the recipe's ingredients). This way, I can try her recipe as intended.

  2. I like her story of wanting to stick to skin care and writing and her husband stepping in to help run the business side of things. It's a nice story. I want to support their business venture since she generously shares her recipes for free.
Now what does this all have to do with one of my favorite ingredients, oats?

Well the first ingredient in the cleansing grains happens to be oats, which I know my skin loves! At our local market, organic oats are inexpensive and available in bulk. This makes them a staple in our kitchen.

First, what are oats? Oat, Avena sativa, is a cereal grass cultivated for its edible seed. According to Live Strong: “oats are a whole-grain food and are rich in fiber, manganese, the B vitamins thiamin and riboflavin, vitamin E and protein. They're also low in sodium and fat and free of sugar, cholesterol and saturated fats.”

One weight loss tradition in my family has been to soak rolled oats in water overnight and then drink the oat water first thing in the morning. I can not tell you why this works, but I've been doing it for a few months with really good results.

Now to get back on track, oats also have amazing benefits for skin. Oats are absorbent, helping to draw out skin impurities, and they act as a mild exfoliant that gently smooths out skin's texture. Oats work well on dry, itchy, sensitive skin and are often recommended for treating eczema, psoriasis and other skin ailments. Oh and did I mention they are inexpensive and readily available in bulk?

In the spirit of Crunchy Betty, I'm sharing my favorite oat-based skin care mask. It also includes kaolin clay (aka white clay), a mild cleansing clay that works well with most skin types. Like oats, kaolin is absorbent and promotes circulation to the skin. Yogurt powder is high in lactic acid, an alpha hydroxy acid that gently improves skin's texture. I've also used plain yogurt or raw kefir in place of the powder when I have it available. It makes for a creamier mask.

Purifying Oatmeal Mask


Ingredients:
1 tablespoon White Kaolin Clay
1 tablespoon Oat Flour
1 tablespoon Yogurt Powder
Filtered Water

Directions:
Mix the clay, oat flour and yogurt powder with water until blended to the consistency of...ummm... crunchy peanut butter! The mixture is definitely a little gritty, but it does apply evenly and dries firm.

First use your regular cleansing method to clean your face. Lightly pat dry, but leave skin as damp as possible. Then apply the mask mixture gently and evenly onto your skin using your finger tips; steer clear of the eye area.

Leave the mask on for 15-20 minutes for your first time; I can have it on as long as 30 mins. If you have very sensitive skin, try a patch test first.

Then wash it off with lukewarm water and end with a splash of cold water; pat your skin dry with a clean towel. Finally apply your favorite moisturizer. If I'm not going out, I like to use raw shea butter. While shea is very heavy, I feel like it envelops my skin in a thick, emollient layer of goodness!

How else do I use oats? To exfoliate, as a daily cleanser, in my deodorant recipes, and I'm even thinking about using that oat water from my family tradition to include in DIY hair preparations. I hope you have fun experimenting with oats, and please share your favorite oat recipes with me in the comment section, on Facebook or on Twitter @floraesthetics!

Thursday, August 02, 2012

Poppy Salt Body Scrub


We are starting a weekly exfoliation routine in our household. Florida summers require a lot more scrubbing. This means that I get to play with new ingredients more often. The scrub recipes are usually for a one-time use and very easy to make.

Today's recipe uses poppy seeds and salt as the physical exfoliators and sweet almond oil and grapeseed oil for the lubricant. Sweet almond is rich in vitamin e, which softens and heals the skin. Grapeseed, like sweet almond, is rich in antioxidants that fight off damaging free radicals. It is also known for protecting skin's collagen. Combined, these ingredients are both cleansing and nourishing for the body.

To scent this recipe, I had my boyfriend pick the essential oils by smell only. He chose lemon, sweet orange, juniper berry, cypress and eucalyptus. Surprisingly, or maybe not so surprisingly according to aromatherapy, he picked a lot of detoxing, antimicrobial-type oils just before his work out. 

Recipe: Poppy Salt Body Scrub


3 Tbs Sea Salt
2 Tbs Sweet Almond Oil
1 Tbs Grapeseed Oil
1 tsp Poppy Seeds
5 drops Lemon Essential Oil
5 drops Sweet Orange Essential Oil
4 drops Juniper Berry Essential Oil
3 drops Cypress Essential Oil
2 drops Eucalyptus

Blend all ingredients thoroughly in a bowl. Apply the scrub onto clean skin using light pressure and circular motion. Rinse with warm water and pat dry. Do not use soap when rinsing. Also, be careful in the bath tub as the oil might make the floor slippery.

The smell was very mild and masculine, while the oil blend is light and smooth for summer. I hope you enjoy!

Monday, July 09, 2012

Hair Therapy 2 – Nourishing Treatment Oil


I have experimented with oil blends on my hair in the past (Hair Therapy 1) with mixed results. While my hair soaked up the deeply nourishing oils, the formula was too heavy and viscous for every day use. Fast forward one year and add a little more knowledge, and I found a formula that I really like. I am not at the love stage yet, but it is getting there.
 

Hair Treatment Oil

Ingredients:
5 parts Coconut Oil
1 part Olive Oil
1 part Castor Oil
5 drops Vitamin E

Optional:
1 part Emu Oil
6 drops Lavender EO
6 drops Rosemary EO

Instructions:
Combine all of the ingredients in a glass jar and place in a bowl of hot water for a few minutes. Remove from water bath and shake vigorously until oils are well blended.

Directions for Use:
As a hot oil treatment, place jar in a bowl of hot water for 5 minutes. Apply warm oil to hair and cover with a shower cap. After 30 mins, shampoo and condition hair as usual.

As a finishing oil, place 2 drops of oil into palm and warm between hands. Lightly apply the oil to the ends of the hair and to tame frizz.

Why did I choose these oils specifically?

  • Coconut Oil – Coconut oil has tons of benefits for hair. It's molecular structure allows coconut oil to penetrate the hair shaft to protect and moisturize. Coconut oil is also high in lauric acid and vitamin e, making it good for many conditions: hair loss, itchy scalp, dandruff.
  • Olive Oil – Olive oil contains vitamin E, niacin, biotin and vitamin D, which are all beneficial for the hair and scalp. It is also touted as a possible remedy for hair loss. Olive oil, like coconut oil, is very moisturizing for hair because of its ability to penetrate the hair.
  • Castor Oil – This sticky oil is included in the blend for its benefits to the scalp. Castor oil contains healing properties which can prevent bacterial and fungal infections associated with hair loss, dandruff and other scalp conditions. It also has omega fatty acids that moisturize and nourish hair.
  • Emu Oil (optional) – I added emu oil to this blend to make it a little more favorable for people with hair loss and because it emulsifies well. There's a lot of technical information out there about emu oil and hair loss, but I added it to my blend because I happen to like how is feels on my skin. The beneficial properties are a bonus. I noted it as optional because it is not very animal-friendly.
  • Vitamin E – In addition to being one of the most healing vitamins, vitamin e helps preserve the hair treatment oil.
  • Rosemary and Lavender Essential Oils – These oils are both used for hair and scalp health. Plus, they smell great!

This formula blend is light on my fine, curly hair. It still has some viscosity from the castor oil, but that actually helps with flyaways and frizzies. As long as I only use a small amount, it works great as a styling tool. I will also leave it on overnight when I want to really treat my hair to some therapeutic oil lovin'. Overall, this oil blend is helping my hair feel healthier, softer and fuller. 

Do you swear by a certain oil for your hair? Let me know in the comment section, on Facebook.com/floraesthetics, or on Twitter @floraesthetics!

Sunday, July 08, 2012

Reader Stars: Top DIY Recipes & Beauty Posts from June & July


Here are some of my favorite blog posts from June & July:

Beauty Reflections: Get Your Hair Some Structure
A quick review of Structure, 100% vegan hair styling products free from sulfates, parabens, silicones, artificial colors & dyes, glycols, gluten, DEA & MEA
Follow on Twitter @BeautyReflectTS


A double-duty coconut oil and jojoba conditioning blend that nourishes hair
Follow on Twitter @JillsGoodThings


Now that my friends are having babies, an all-natural diaper rash recipe is a good gift idea
Follow on Twitter @MerryMessyLife


A review of beauty boxes that definitely satisfied my curiosity about this trend
Follow on Twitter @afrobella


Now that summer is in full swing, these DIY healing sunburn recipes are good to have on hand
Follow on Twitter @feelgoodstyle


Revistalise Your Health: Top 8 Uses Of Eucalyptus Oil
I'm a big fan of essential oil education... so many applications
Follow on Twitter @revyourhealth

Bohemian Kate has amazing pictures on her blog!

Sugar Lip Scrubs: Two Variations from Bohemian Kate and The Beauty Delicacy
These sweet DIY lip scrubs are easy to make
Follow on Twitter @bohokate and @KOCOENVY


A review of {green} products containing green apple, which is rich in malic acid
Follow on Twitter @ChicandGreen


Revitalise Your Health (again!): 5 Simple Acne Masks To Make At Home
As simple as they come DIY acne mask recipes


The Natural Beauty Workshop: Fresh Cucumber Mojito Salt Scrub
This salt scrub recipe takes me home to Miami and days spent on the beach
Follow on Twitter @FNWL


Quirky list of hair and nail tips... my personal favorite is the paper bag curls
Follow on Twitter @RiceBunny


Organic Beauty Talk: Ingredient Talk: DEA, MEA & TEA
Discussion of toxic ingredients always peaks my interest
Follow on Twitter @organicbeautytk

Wednesday, July 04, 2012

DIY Spa Treatments for At-Home Pampering


I've realized that my attention span makes blogging consistently a real challenge. While I may not be posting as often as I would like, I have definitely been experimenting with DIY recipes. My boyfriend and I are using almost all our own homemade skin care products.

My skin care routine:
  • Oatmeal Cleanser
  • Vitamin C Toner
  • Face Oil Blend or Moisture Balm Lotion
  • Arrowroot Deodorant

My hair care routine:
  • Apple Cider Vinegar Hair Rinse
  • Nourishing Hair Oil
  • Aloe Styling Spray

I am still using some store-bought natural skin care products. Right now, I'm a big fan of the following:
To show you I really have been working hard, I am sharing my green beauty spa-style pampering routine. When I need a little TLC...

DIY Spa Day
  1. Inspiration: Fresh Cucumber Mojito Salt Scrub from @FNWL
    Foot Treatment: I like to start with a foot treatment. I first soak my tootsies in an apple cider vinegar and lemon bath. I mix 1/2 cup vinegar and the juice of 1 lemon with 1 gallon of water. I soak my feet for about 15 mins. The vinegar works great at softening rough, calloused skin. Then I scrub using a foot file and follow that a with coconut oil sugar scrub. I mix organic sugar with coconut oil until it forms a nice paste. You can use sugar or salt for a scrub, either of which will leave the surface of your feet feeling smooth and soft.

  2. Hair Treatment: First I moisten my hair with a little bit of water and apply a penetrating hair oil. I blend 6 parts coconut oil to 1 part olive oil, castor oil and emu oil. These oils all have beneficial properties for hair, especially the coconut and olive oils which penetrate the hair shaft making them great for repairing hair damage. I leave the oil blend on my hair for 30 mins. I like to just rinse it off because it leaves behind a nice residue on my fine, dry hair, but you can follow the treatment with your regular shampoo and conditioner if you have oilier hair.

  3. Face Mask: I make an oatmeal and kaolin clay cleanser for daily use, but I adapt this recipe to make a mask when I need extra attention on my face. I use a good quantity of the powder cleanser blend and mix it water and a few drops of my Vit C Toner to make a paste. I apply it to my face and leave it for about 15 mins. It works so well at absorbing dirt from your skin and leaves your face feeling softer and clearer.
These three steps always leave me feeling renewed and refreshed. My recipes aren't perfect, so I recommend searching for tried-and-true DIY recipes that fit your skin type and/or the climate in your area. For inspirations, check out my Favorites section where I link to my favorite sources for DIY recipes.

I am way more active on Twitter @floraesthetics and on facebook.com/floraesthetics, so follow me for more DIY beauty ideas!

Saturday, March 31, 2012

DIY help! Deodorant Conundrum

For the past few months, I've been working on a homemade deodorant recipe. Sadly, my chemistry skills leave something to be desired. I know the formula works, and it works really well. Anytime I use it, I'm stink free all day. My boyfriend is also a good guinea pig for the effectiveness as he works out often and comes home still smelling fresh.

HOWEVER (yes in all caps), we have had random reactions and sensitivities to the deodorant and need to take a break from using it every now and then. I've also asked my friends to help me test it. Some have had a reaction, while others have used it successfully. I've gone back a few times and re-researched all the ingredients, reading blogs, searching the cosmetic safety databases and consulting my reference books. Everything I read says that these ingredients should be safe and effective. If it is not the individual ingredients that are causing a reaction, then it must be how I'm mixing them, right?

Formula 3: solid, hard consistency
Then there is the issue of texture and consistency. The recipes have come out ranging from a hard solid to a runny cream. I've experimented with different blending techniques and quantities of ingredients. I melted the oils first and the blended them with the dry ingredients. The last time, I combined all the ingredients first, then set the mixture over a double boiler to soften the oils and butters as I mixed it by hand. I've also tried changing the ratios of dry to wet ingredients, but this just produces either an oily or gritty formula. Nothing seems to be working.

Here's what I figured out today...

I'm not too proud to ask for help. I could use some constructive criticism and suggestions to help identify things that I might be doing wrong. I'm frustrated with the process. My brain just doesn't work well with numbers. And I cringe at the waste of good ingredients. Maybe the same bloggers that I've been using for inspiration are up to helping me with this challenge?

Floraesthetics Deodorant - Formula 4

Formula 4: creamy, runny consistency
Dry Ingredients:
  • 1/4 cup Baking Soda
  • 1/4 cup Corn Starch
  • 1 tsp White Clay
  • 1 tsp Oat Flour

Wet Ingredients:
  • 3 tsp Coconut Oil
  • 3 tsp Cocoa Butter
  • 2 tsp Shea Butter
  • 1 tsp Sweet Almond Oil
  • 1 tsp Vegetable Glycerin
  • 1/2 tsp Emu Oil
  • 6 drops Lemongrass Essential Oil
  • 6 drops Lavender Essential Oil
  • 3 drops Tea Tree Essential Oil
  • 3 drops Rosemary Essential Oil
  • 3 drops Vitamin E
  • 3 drops Grapefruit Seed Extract

Directions: Sift dry ingredients into a heat-proof bowl. Then add all the wet ingredients and set bowl over a sauce pan with hot water (not boiling) on the stove. Mix until ingredients are soft and totally incorporated. Remove from heat and pour into small glass jar. Let it cool before using.
___________________________________________________________

If you have ideas, please leave a comment with suggestions, send me an email rocio@floraesthetics.com, or write on my Facebook wall facebookcom/floraesthetics. Any insight into this deodorant conundrum will be much appreciated!

Previous posts on my homemade deodorant attempts:

Thursday, March 29, 2012

Easy, DIY Clarifying Shampoo Recipe

When I started making my own skin and body care products, I had three or four different shampoo and conditioner bottles in my shower, not counting my boyfriend's products!

I alternated daily between brands so that my hair wouldn't get used to one product. I wanted that "it's working" feeling. Now I don't know if there is any science to alternating shampoo and conditioner formulas, but even with this strategy I was never happy with my hair.

Recently, I've stopped using almost all hair products in exchange for an apple cider vinegar rinse every day. I mix 1 part vinegar to 4 parts water in a spray bottle and keep it in the shower. When I wet my hair, I spray on the mixture and let it sit while I shower. Caution: vinegar may run off onto your face but it's good for your skin too.

I also shampoo about one a week. Right now I'm using either Monica's Cococastile Soap or L'Oreal Sulfate-Free Cleansing Conditioner. These both do the trick without stripping my hair. I follow the shampoo with the vinegar rinse.

This routine has given my hair a chance to breathe and my scalp feels healthy too. The apple cider vinegar (specifically unfiltered) has so many wonderful benefits, but it works on the hair by balancing the PH and closing the hair cuticles for smoother, shinier hair.

In my quest to go totally natural, I am going to try making my own shampoo. I got an easy recipe at the Florida Herbal Conference's natural beauty workshop.

Homemade Clarifying Shampoo:
-1/4 cup distilled water
-1/4 cup liquid Castile soap
-1 tablespoon baking soda
-1/2 teaspoon jojoba or grapeseed oil

Mix ingredients in a flip top bottle and shake well.

The baking soda in this recipe will clean hair thoroughly, but it can be a little harsh for daily use. Make sure to use this shampoo less frequently, maybe once a week, and then rinse with apple cider vinegar to balance your PH levels.

If you want to wash your hair more often, just take the baking soda out of the recipe for a milder shampoo.

I haven't tried it yet, but I'm looking forward to sharing the results with you. Let me know if you have any great shampoo recipes I can experiment with!

Thursday, March 22, 2012

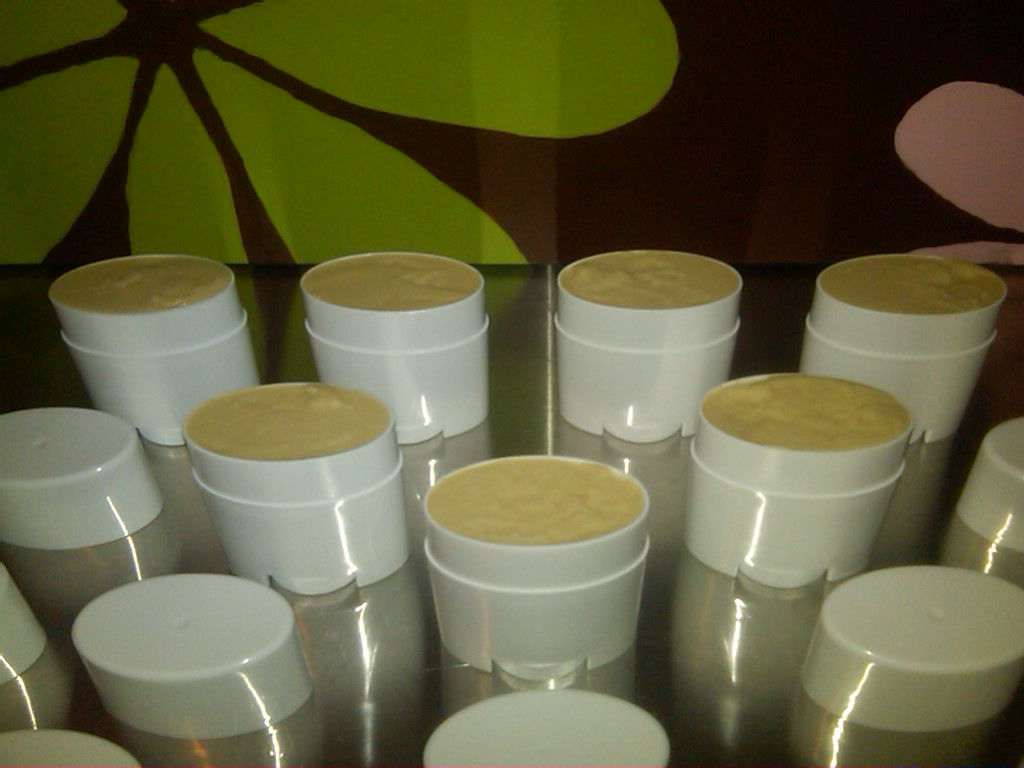
Homemade Deodorant In Twist Up Tubes


I have been slacking lately. I haven't worked on my deodorant formula in a while, since we still have some from my last batch. However I did have a friend try it out, and he gave me some good feedback. 

Today, I went back to the drawing board (again) and made a couple of modifications. I removed the cypress and juniper essential oils and added lavender essential oil to soften the scent. I also reduced the amount of cocoa butter to make it more spreadable. I might regret that as it gets hotter outside this summer. Finally, I packaged the formula in traditional deodorant twist up tubes for the first time. I bought .5 oz tubes and am shrink wrapping them to make them look official. My recipe made 7 travel-size deodorants!

Here are a couple pictures of my DIY Adventures today:


Update: This attempt was, sadly, unsuccessful. The consistency was far too soft for actual application using a tube. I applied it with my fingers, and the recipe is still effective. But the application part of it needs work... back to the drawing board.


Tuesday, March 20, 2012

How Natural Beauty Loving Hippies Vacation

After working at Clinique for a few years, my mom decided to get her esthetician license. This happened while I was in high school, working at Lancome. That Christmas, I bought my mom Janice Cox's Natural Beauty at Home book.

Needless to say, natural beauty was not as trendy back then. It was more for us to play with ingredients in the kitchen than for actual application on her clients. When I moved to college, all things beauty were put on hold. My mom would give me awesome facials when I went home to visit, but that was about it.

Then a couple years ago, I found a giant aloe leaf in my sister's bathroom. She always struggled with her skin, even with an esthetician for a mom. My heart goes out to people with trouble skin because it is not easy. My sister was using aloe gel straight from the plant for a moisturizer. While I knew aloe was healing, I thought she should be using some kind of oil to help moisturize her dry skin too.

Source www.janicecox.com
Enter Ms. Janice Cox. That winter I pulled her book out and started researching recipe ideas to help my sister. That one conversation got my beauty juices going again, and now two years later I'm attending the first Florida Herbal Conference this weekend in Ocala.

My second beauty book was Rosemary Gladstar's Herbal Recipes, and I'm so excited that I will get to hear her speak at the conference. I'm also looking forward to the nature walks through the Ocala National Forest to learn about native plants and herbs. There is going to be lots of yoga, which is so healing for my hyperactive mind. I will also be first in line for the natural beauty and healthy cooking workshops. The best part of all, no offense to anyone, is that there are a bunch of earth-friendly, natural beauty loving hippies gathering in one place. It sounds fun and relaxing all at once!

Here are the workshops I plan on attending:
  • Growing Herbs in Florida Climate
  • Healing Belly Dance 
  • Walking Over Medicine: Edible & Medicinal Weeds of North Florida 
  • Natural Beauty and Body Care (of course!)
  • Ethnobotany Walk
  • Food as Medicine, Medicine as Food 
     
If you are interested in learning more about the conference, follow @HerbConference. If I have reception, I'll tweet periodic updates after the workshops @floraesthetics, hashtag #HerbConference.

Saturday, March 17, 2012

DIY: Aloe Vera Face Mask


I follow a bunch of great beauty blogs and my favorite posts are usually about DIY recipes for homemade skin care. I've spent the past two years learning how to make homemade beauty products, and it is not easy. When I find DIY recipes that require only a few ingredients and are easy to make, I get excited.

Today, I tried an Aloe Vera Face Mask recipe from Revitalise Your Health.

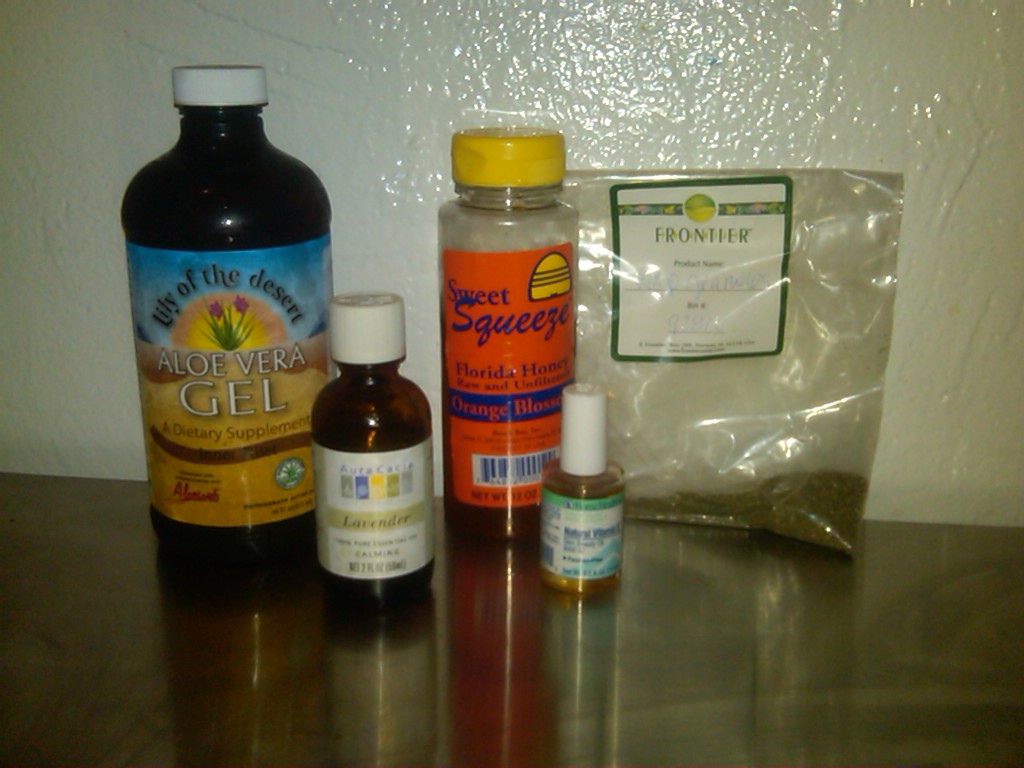
The ingredients were simple and made total sense:
  • 1 tablespoon of powdered seaweed (kelp)
  • ½ tablespoon of Aloe Vera gel
  • ½ tablespoon of raw honey
  • 1 capsule of vitamin E
  • A few drops of essential oils (I used 3 drops of lavender)

The instructions were quick and easy too:
Combine all ingredients together and mix well, squeeze out contents of vitamin E capsule and add to mixture. Apply mixture to face, throat, and neck. Leave on for approximately 20-30 minutes. Rinse using warm water.

And the the verdict:
This recipe gets an A+ for simplicity of ingredients and preparation. It literally took me less than 10 minutes to gather the ingredients, make the recipe and apply it to my face.

However, I have to take some points off for application. It was so messy! The mask clumped together and did not spread evenly on the skin. It was actually a challenge to get this much of it on (see picture on right). And I recommend applying the mask before you clean your bathroom because it was all over my sink. I can overlook all of this because making homemade beauty products is a messy business overall.

The removal part of the process was a little better. It took a while to come off, but it was less messy than the application part. Caveat: You will have kelp pieces all over your hair if you apply it near your hair line.

As for the results, my skin definitely felt as if it had a mask treatment. It was softer and smoother, but it was also very red. I don't have overly sensitive skin, but if a product causes a reaction, it is very visible. The skin around my nose and cheeks was definitely red, but it didn't feel irritated at all. Weird!

Instead of applying moisturizer right away, I waited a few minutes to see how my skin felt after it dried. The texture of my skin still felt good as did the level of moisture. I didn't have that dry, tightness that I usually feel after using most face masks.

After about 10 minutes, I checked again for redness. It had reduced significantly to only a few red blotches, so I applied a light layer of emu oil, known for reducing inflammation. My skin soaked it up.

Overall, the Aloe Vera Fask Mask was a great little DIY project. It was easy to use and left my skin feeling smooth and pampered. Beware, however, if you have sensitive skin.

Wednesday, February 01, 2012

Product Review: Monica's Cococastile Soap


Confession: I love bars of soap! Whether I'm having a bad day or rewarding myself, pulling out a new fragrant bar of soap really hits the spot.

Image: Monica's Cococastile Soap


One day at the farmer's market, I saw a table full of soap and immediately proceeded to 'oooh' and 'ahhh' over the pretty colors and lovely smells. Monica, who makes the soaps, took the opportunity to give me a sample of her oatmeal bar. She explained that her soaps are all natural and can be used as shampoo and for shaving too. I was very skeptical of these additional claims, but I decided to keep an open mind.

I first tried it on my face and body. It was wonderful! My skin felt clean and soft, and even after a hot shower, there was no tightness. Then I tried shaving with it. This was a little less successful as the oatmeal soap has little bits of exfoliating oatmeal that got stuck in the razor. So I went out and got her Bay Rum scented soap, which is smooth with no additional bits. I gave it another try, and it worked great. The shave is not as smooth as with shaving cream, but I like the soap as a quick, natural alternative that doesn't leave rust rings in the bath tub.

Finally, I had to try the shampoo claim. I seriously did not think it would work. I have fine, curly hair that is unruly and addicted to conditioner. But Monica said that she did not need conditioner with her soap, so I just shampooed and let it dry naturally with no product. Let me tell you, I was shocked. While my hair still had some frizz, it was so soft and the curls got tighter and... curlier! For not having conditioned or added any product, my hair looked great.

I like Monica's Cococastile Soap so much that it has kind of ruined other bars of soap for me. While I still enjoy opening up a fun, new bar of soap, I find myself using it for only a couple days before I put it away and pull out Monica's soap. My favorites are Oatmeal, Bay Rum and Patchouli-Ylang Ylang. I highly recommend trying them out for yourself.

The Details

Ingredients: olive oil, coconut oil, fragrance, food grade dyes, and natural essential oils.

Price: $5.50 for 6 oz bar

Availability: online at http://www.etsy.com/shop/SoapmakerMonica, and locally in Gainesville (Ward's Citizen's Co-Op, Union Street Farmer's Market on Wednesdays)

Friday, January 20, 2012

Trends & Techniques: Olay Professional Pro-X Advanced Cleansing System

First a little background on my skin...
Image credit www.clinique.com

When I hit puberty, I remember my mom taking me to the Clinque counter at Burdines and buying me a 3 Step kit. I was skin typed a mild bar-, clarifying 2-, and dramatically different-kind-of girl. I was so excited that I was ridiculously diligent about cleansing my skin twice a day. Maybe as a result of regular care or maybe good genes, I have been blessed with great skin.

If we get generic, I have combination skin leaning toward the dry side. As a teenager, I thankfully never suffered from acne. On the contrary, my skin was something I didn't think much about to the point I barely ever wore make up. I still don't wear much make up, but luck with my skin changed as I grew older and learned what real stress was. While, knock on wood, I still don't have issues with acne, I occasionally get 'regional' breakouts on my chin and around my nose. And when I get pimples, they are specifically the cystic, painful kind. Ouch!

All these things combined, I'm still lucky in the skin department. My biggest complaints are dark circles and the texture of my skin. I am a sucker for product commercials touting bright, radiant, flawless skin. However, most of these products do nothing more for me than irritate my skin. I find that I have to manage my exfoliation schedule with great care... exfoliate too much or too often and I end up with rough, uneven skin that is even more prone to those 'regional' breakouts. For this reason, I am very sensitive to the type of exfoliation methods I try on my skin.

Image credit www.olay.com
But my boyfriend's mom knows that I have been working on the blog and homemade beauty products, so she got me the Olay Pro-X Advance Cleansing System starter kit for Christmas. She used one herself. I'd also had a conversation with a colleague about how she loves her brush. I'm not sure which brand, but she said a friend recommended it. It was part of her daily beauty routine, one of the things that worked really well on her skin. I was cautious about trying products like the Pro-X, but the recommendations made me curious.

My Experience:

The batteries were a pain to put in. My guess is that it is on purpose to make it waterproof, but it took a few of us a few tries to get them in. That being said, it was very nice that the batteries were included. The bristles on the brush head were softer than I expected, which made me a little less cautious to try it out. It also had a good feel to it, fitting my hand nicely. At Sephora they had a spin brush display, and I didn't like the “feel” of some of the pricier brands. They were clunky!

I hoped in the shower and grabbed the brush and the trial cleanser that came with it. I've used Olay products in the past, mainly the Beauty Fluid, with good results, so I decided to try it as the company intended. Moistening my skin with warm water first, I applied the exfoliating cleanser and got to work with the brush. Using soft circular motions, I glided it lightly over the surface of my skin, applying even pressure throughout the process. All in all, it was a nice experience and my skin definitely felt as if it had shed a layer, but I didn't really like the cleanser. It was not a good lubricant between my skin and the brush.

My skin was a little red afterward, but I applied some Aloe Life Skin Gel followed by Floraesthetic's My Favorite Moisturizer and the redness went away. My skin did look a little brighter, but the texture was actually a little rougher. As the day went on, I kept tabs and the texture remained too...well... too textured!
Image credit www.himalayausa.com

I tried the brush a week later with Organique Neem & Turmeric Face Wash, a bit drying for winter but it has a great gel consistency that I thought would be a better lubricant for the Pro-X brush. It was better and my skin was not as red following the treatment. At this point I'm still not a fan of the texture issue, but I did try it on my lips and really, really like how it sloughs away all the dry, chapped skin. My lips were silky!

I got my boyfriend in on the brush testing. He likes a little more exfoliation than I do, so I use the Neem & Turmeric again, and he liked the Pro-X brush exfoliation just fine. He also wanted some lip action ;-)

Overall, the Advance Cleansing System is not my favorite tool. But in this case, I think it's personal preference and a skin sensitivity issue. My mom loves Buff Puff's, but they are too rough on me too. Occasionally, I use Mary Kay's Microderm Scrub, but I have to be very gentle. However, I am glad to have the brush if just for using it on my lips. I keep it away from water in the shower in a little caddy where it can dry. It is easy to use, easy to clean and easy on the wallet at just under $30. My co-worker and my boyfriend like it just fine. And though I won't use it on my face regularly, it will come in handy for keeping my lips soft and for more serious exfoliation during at-home facials.

If you have tried the Olay Pro-X Advance Cleansing System, let me know how you liked it!